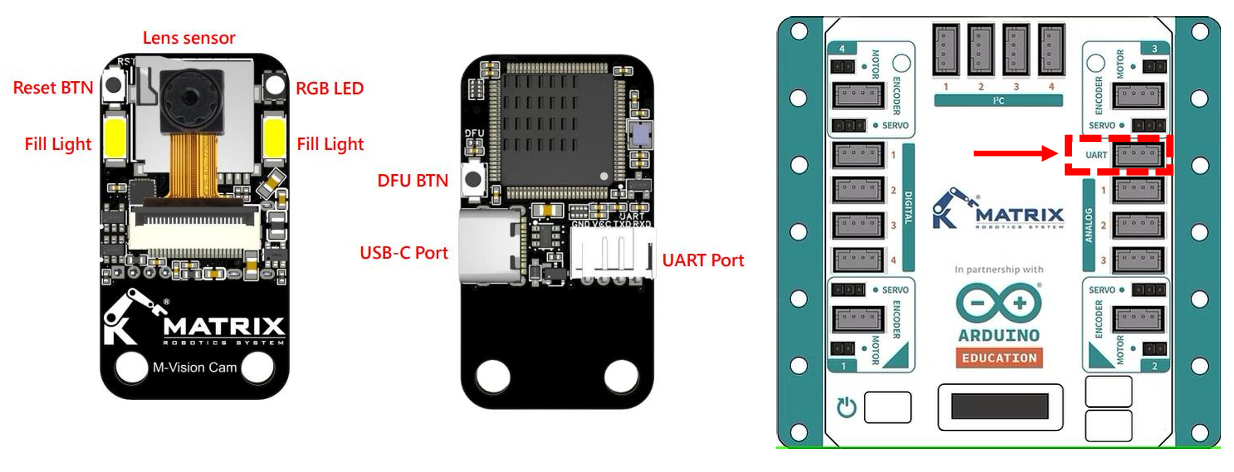
Overview
• AI camera based on Open MV solutions
• Colour and Object detection
• STM32H7 Processor
• UART and Type-C port
Setup and Operating Environment for OpenMV IDE
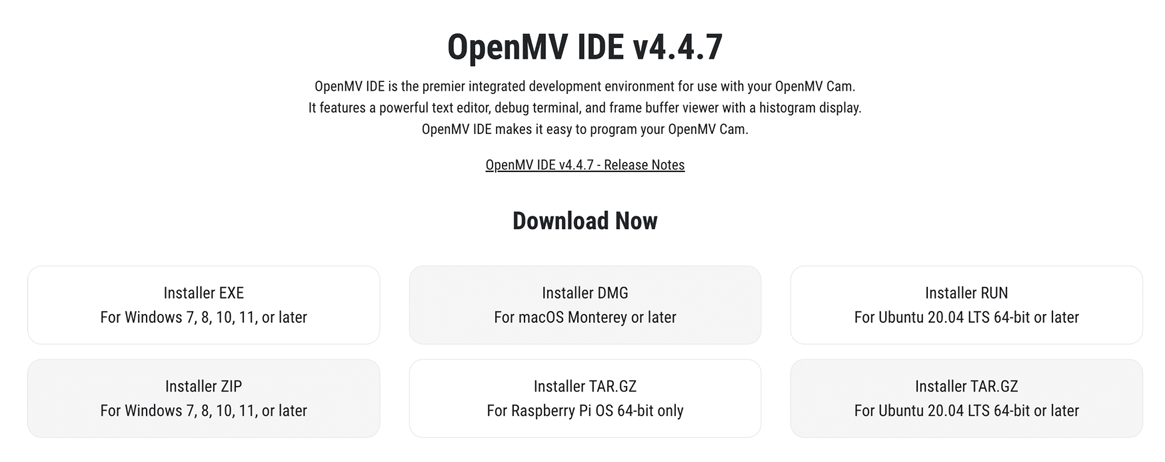
- Visit the official OpenMV website to download and install the version suitable for your operating system: https://openmv.io/pages/download
- After installation is complete, open the OpenMV IDE.
- Use the USB-A to USB-C cable included in the package to connect your computer to M-Vision Camera. The LED will light up green for a few seconds after the connection is established and then turn off.
Important Note: Must use USB-A to USB-C cable to connect M-Vision Camera to the Computer. - Click the connect button in the lower left corner of the OpenMV screen.
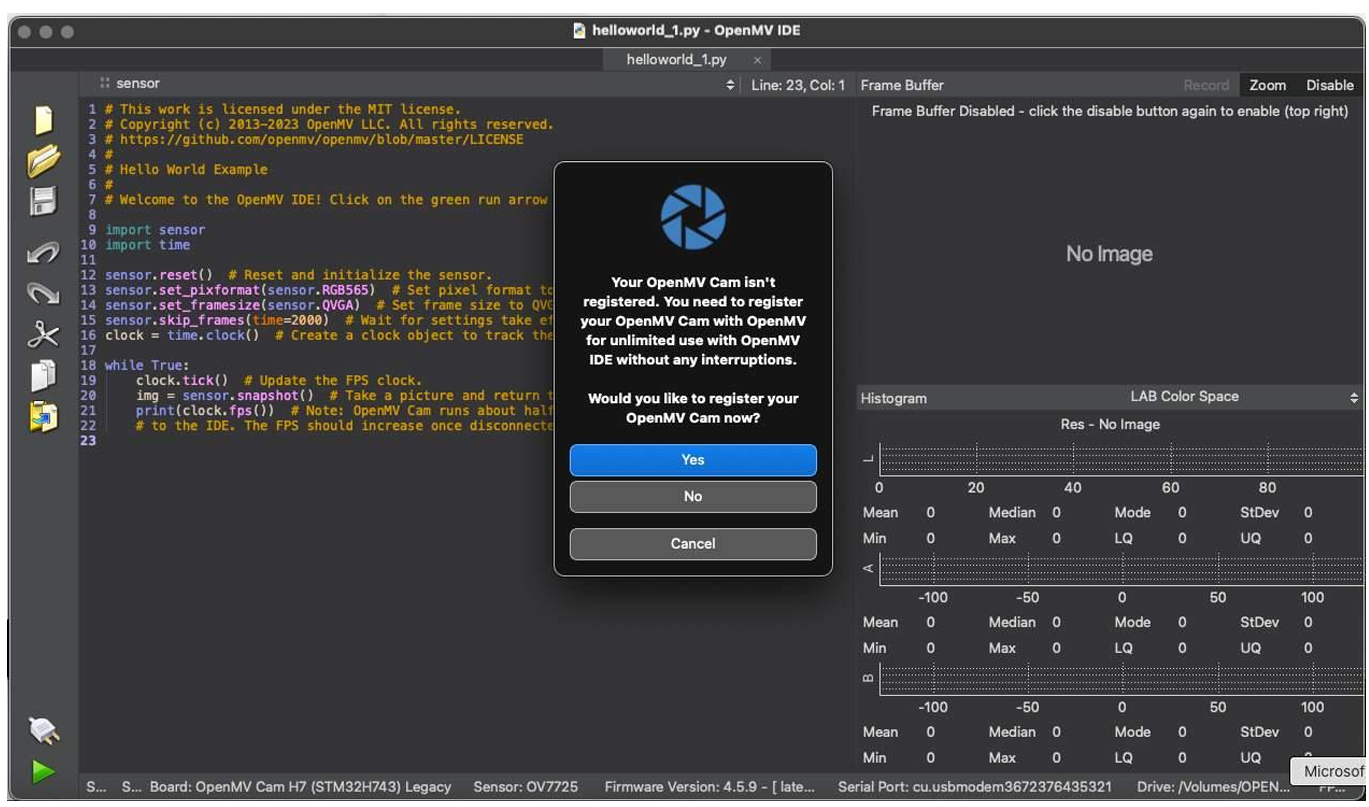
- After successfully connecting M-Vision to the computer, a window will appear asking if you want to register this Camera three times in a row. Just select No or Cancel.
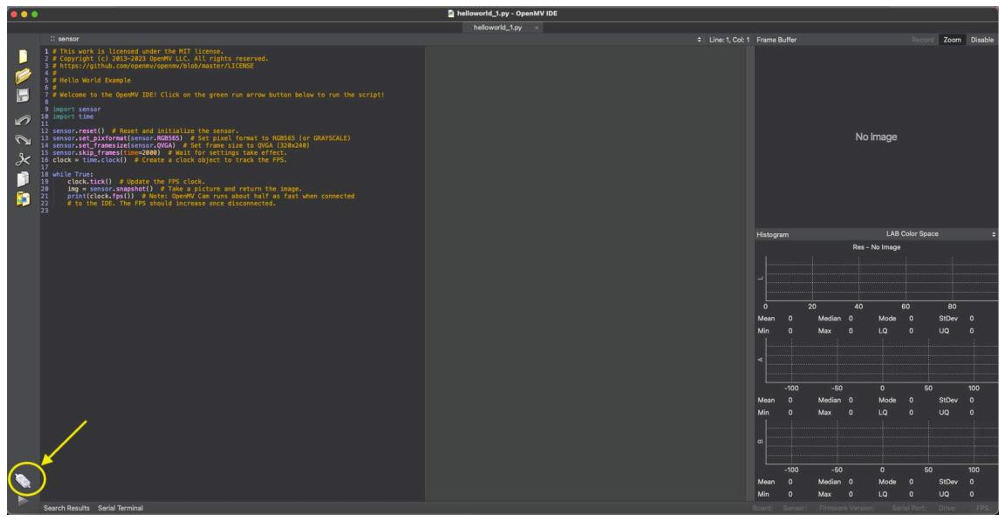
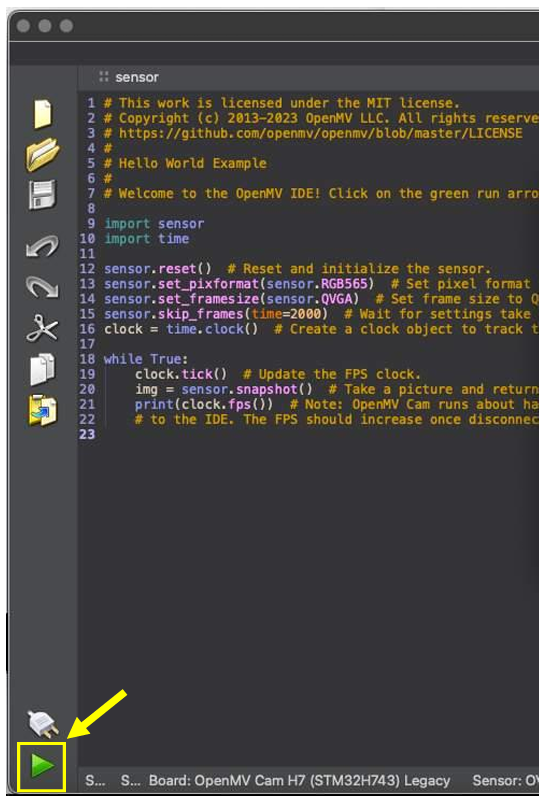
- When the OpenMV IDE launches, it automatically displays a sample code named “helloworld_1.py”. If it doesn't appear, you can find it under the File > Examples menu. More examples will become accessible once the camera is connected as well.
- When the camera is connected, the Start (Run Script) button, located in the lower-left corner of the screen, will become active. By clicking it, you can run your first code and view the camera's output. Click the same button again to stop the code.
Getting Started with the Main Code
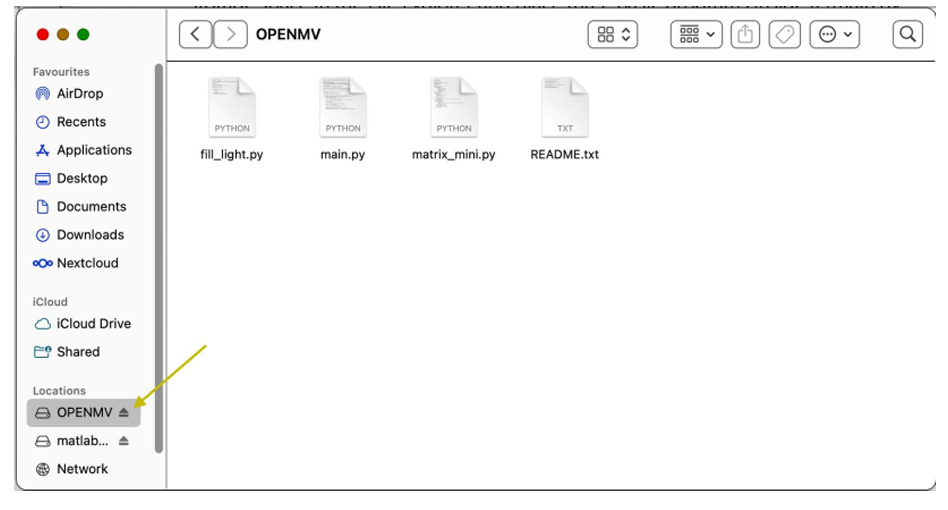
- Once M-Vision is successfully connected to your computer, its storage space will appear in File Explorer (or Finder on macOS under the Locations section) with the name "OPENMV". Inside, you will find three basic programs:
main.py,matrix_mini.py, andfill_light.py. Alternatively, you can download these files from:
https://github.com/Matrix-Robotics/Products-documents/tree/main/Sensors/MVision_Resources/mPython%20Lib(for%20MATRIX%20or%20Arduino)
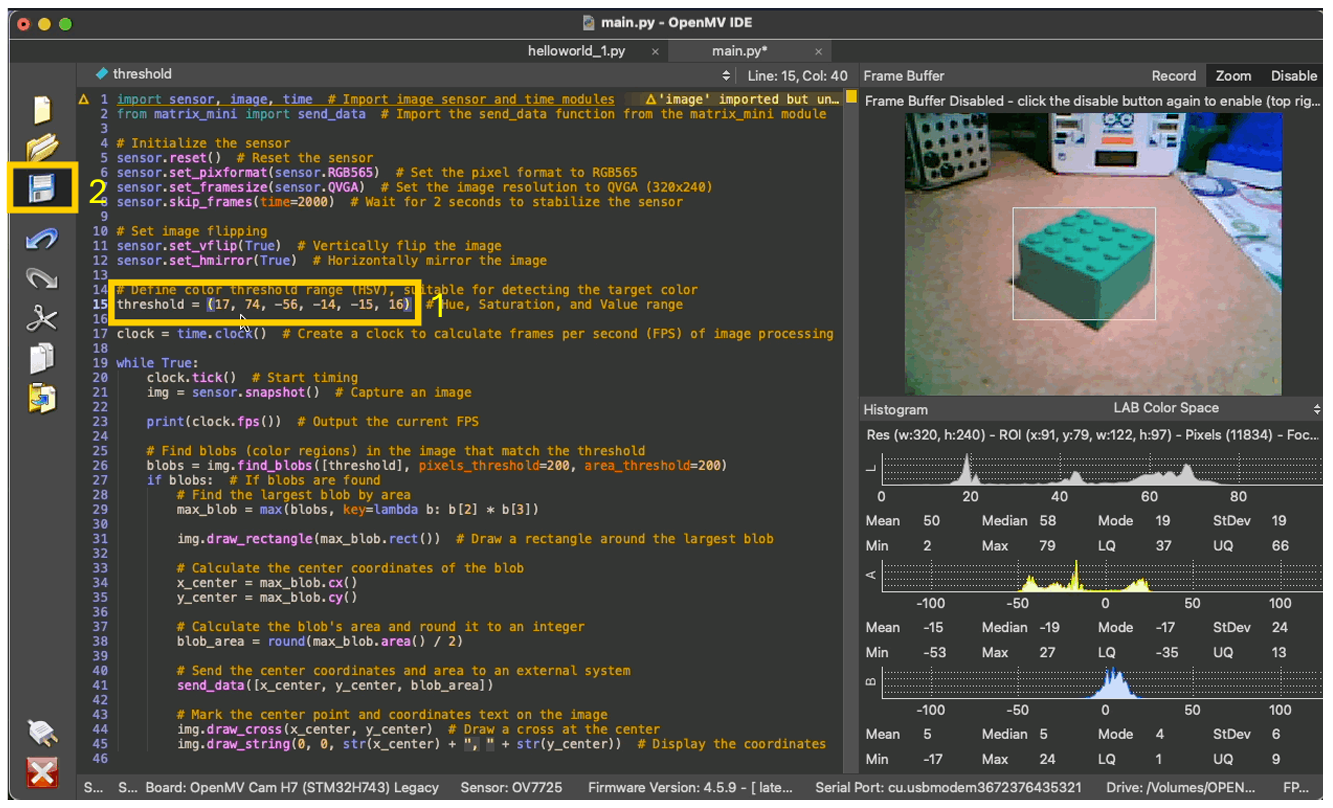
- Navigate to Files > Open Files in the OpenMV IDE.
- Select the OPENMV storage and choose
main.pyto open it. - Run the
main.pycode. - Point the M-Vision Camera at the target and click Disable (top-right corner of the Frame Buffer).

- Use the mouse to select the target you want the camera to detect.
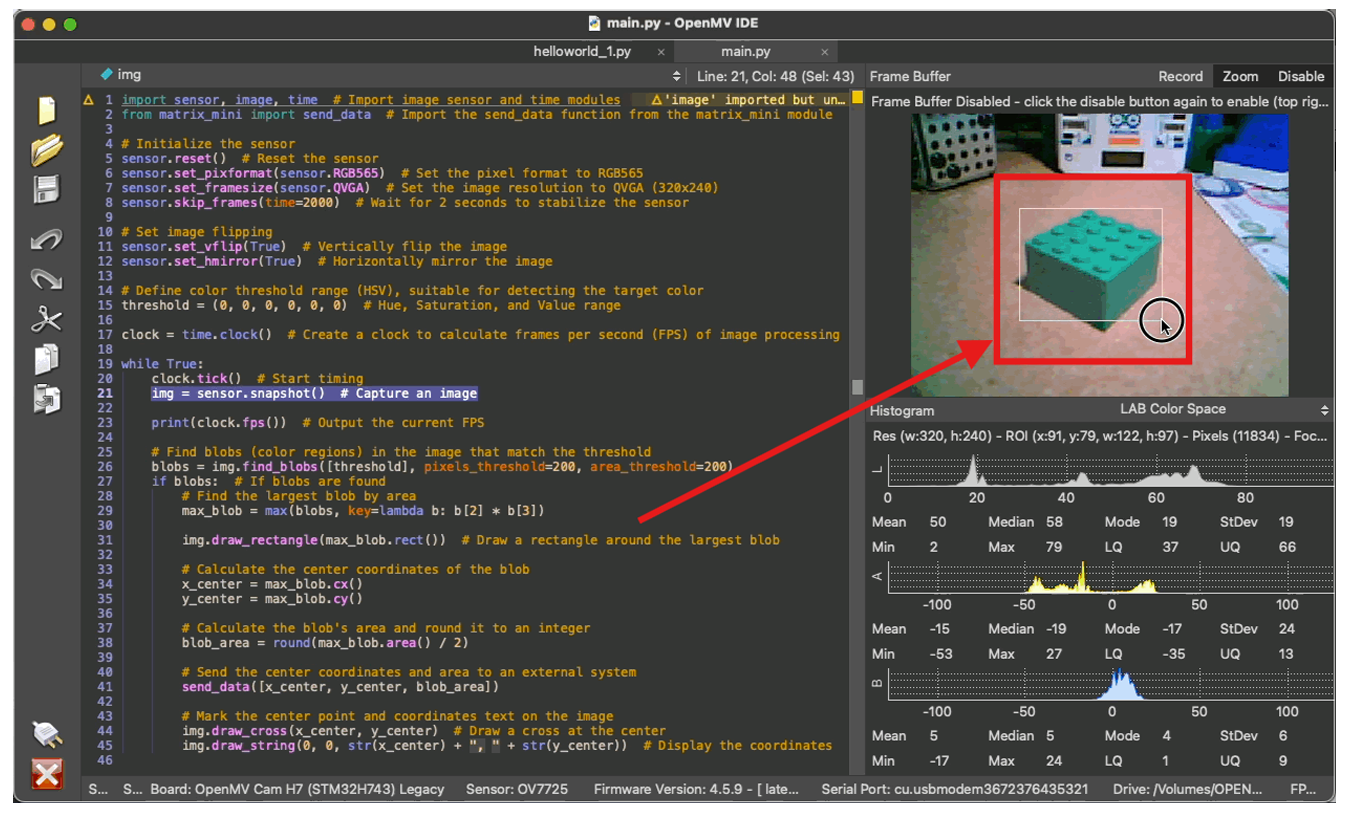
- Open the Threshold Editor via Tools > Machine Vision > Threshold Editor > Frame Buffer.
- Adjust the LAB threshold to the desired Min and Max values using the histogram in OpenMV IDE as reference for the L, A, and B values.
- Make the desired object appear mostly white while the background is black.
- Once satisfied, copy the threshold values and close the Threshold Editor.
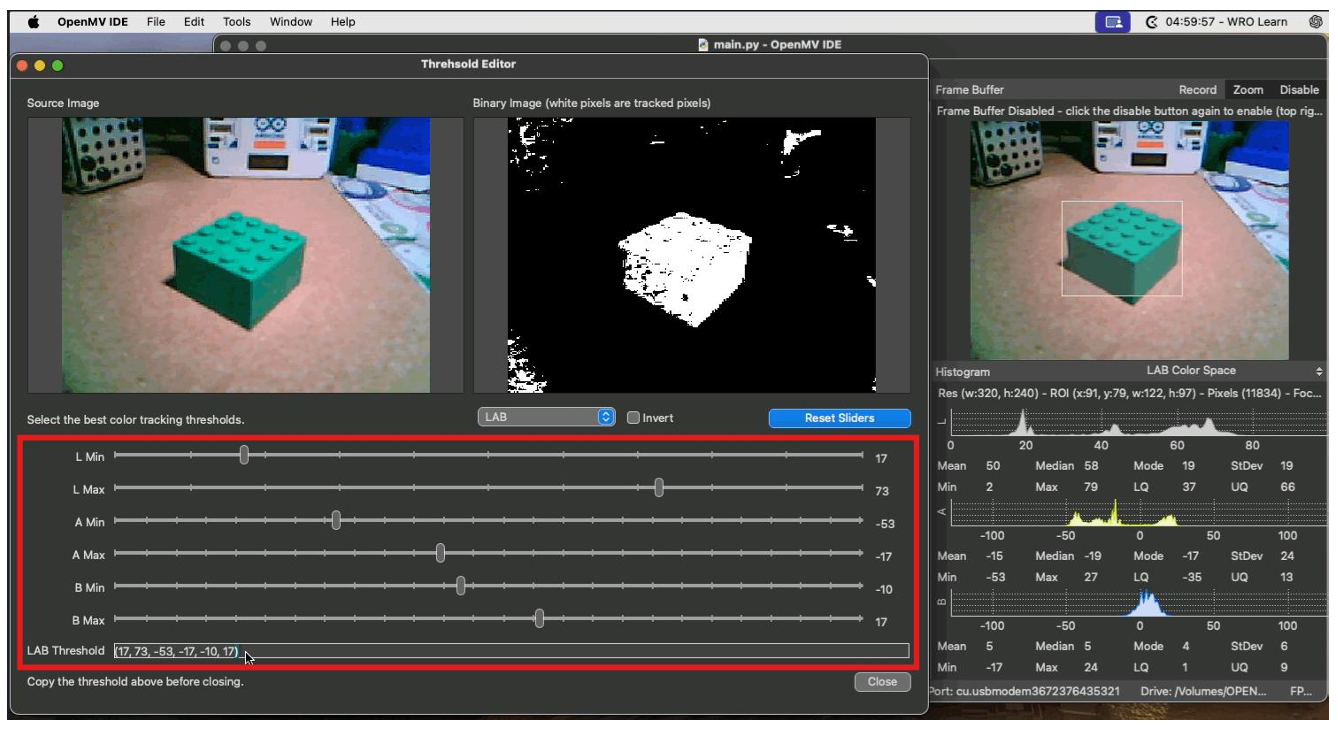
- After copying the LAB threshold values and closing the Threshold Editor window, replace the threshold values in your main.py code. Make sure to save the changes. When the Red LED light turns off, the data is saved, and the Camera is ready to use.
Connecting and Programming the M-Vision Camera with MATRIXblock
- Use the USB-C cable to connect the MATRIX Mini R4 microcontroller to the computer.
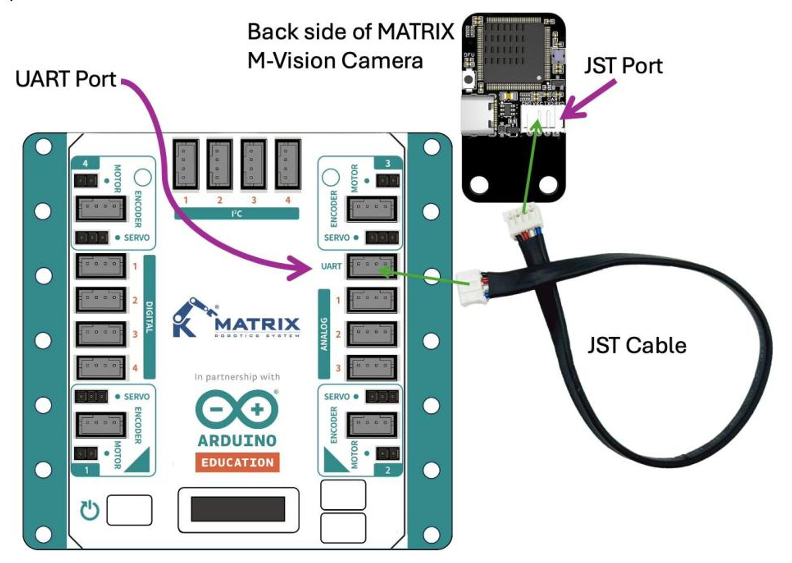
- Use JST Cable to connect M-Vision Camera to the UART port of MATRIX Mini R4.
-
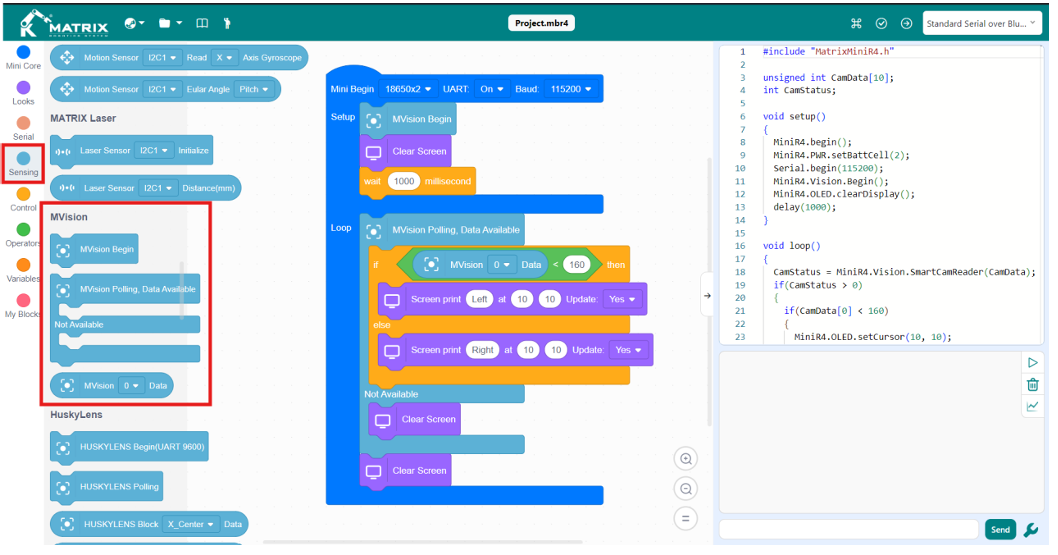
Open MATRIXBlock on your computer.
-
Write the following code in MATRIXBlock to detect an object’s position and display “Left” or “Right” on the OLED screen:
-
Select the correct device in MATRIXBlock.
-
Click on the “Verify and Upload” button (top right of the screen) to upload the code and test the results.
Specifications
| Parameter | Specification |
|---|---|
| Processor | STM32H7 |
| Clock Speed | 480 MHz |
| Flash Memory | 2 MB (User available: ≥100 KB) |
| SRAM | 1 MB |
| Storage Expandability | Supports up to 32 GB SD card |
| Max Supported Resolution | 640×480 and below |
| Operating Voltage | 5V |
| Operating Current | 200mA (without fill-in light) / 350mA (with) |
| Interfaces | USB Type-C, PH2.0-4P (UART communication) |
| Mounting Holes | M4 × 2 |